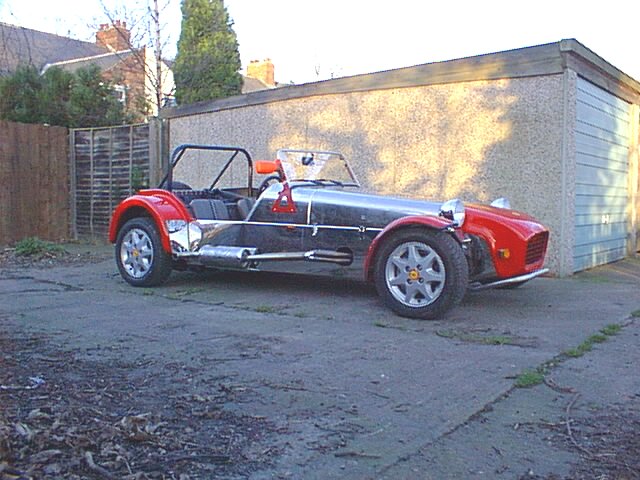
Robin Hood car build. B99
BAF Series 3a Pinto 2.0litre 22
March 99
I bought my car part built! All the suspension was installed as
was the engine and gearbox and the electrics were working. Even
so I had to disassemble a large majority of the bits which had
obviously been put together hurriedly. Date of purchase was 30
December 1997.
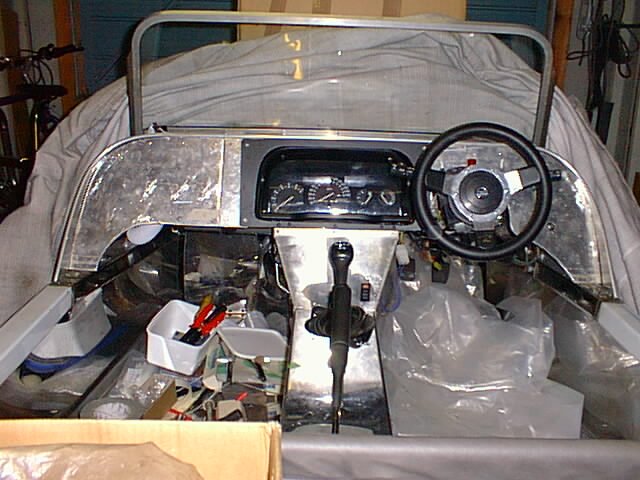
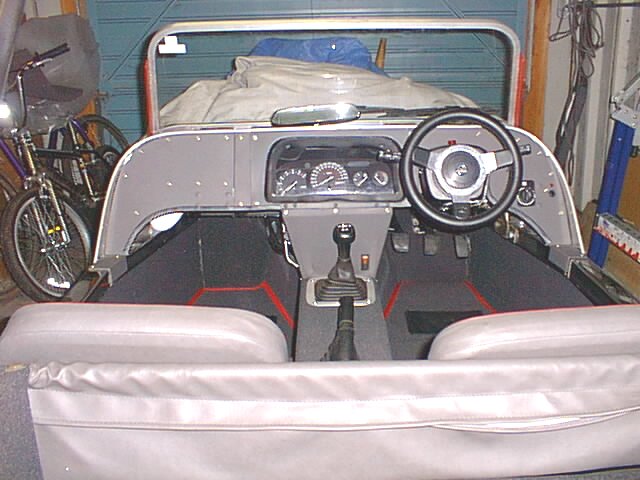
What needed completing? Firstly my main priority was the rather
scrappy offering of a dashboard from R. H. E.. What could I do
with it? After trying at least five different covering materials
and numerous plasters for my fingers I decided to bin it. Trying
to mount the instrument cluster in the space provided was almost
impossible. What I needed was a lateral thought about the whole
thing. Visit a scrapyard was my first idea. These places can be
an Aladdin’s cave if you know where to look. I was even
offered a number of 1.6 mm 8 feet by 4 feet aluminium for 10
pounds each! Pity I wasn’t building a LO-COST!
Having settled for a smaller piece of aluminium for two quid I
borrowed a friend's electric sheet cutters and set to cutting out
a new dashboard. What a pig of a job it would have been with a
hand-powered unit! Next thing to do was mount the instrument
cluster. What sort of Ford and which model was it from? Answer.
Visit another scrapyard dealing with Fords and plead total
ignorance. I was assured that the model I wanted was a Ford
Escort mark 5.
Managed to find a cowling to fit the instruments into. Had to
manufacture a deep frame to hold the cowling-used some of the
spare aluminium together with rivets and body filler. Now things
started to look much better. This small job had now taken me
three weeks! Must start on the windscreen.
Are they joking on the video about making the screen? What a
pathetic design. I could do better with both eyes closed and
hands tied to my feet. Still others seemed to have managed, so
why couldn’t I-after all I was supposed to be quite a
handyman. Actually the screen went together rather more easily
than I expected but didn’t sit on the scuttle the same way
that it looked on the video – my screen supports didn’t
look anything like Richard’s offering either. Just a minute,
what about the bloody demister…. AAAAARRRGGGHHH! Spit. How
the hell can I make all this stuff work? Having decided to stick
with all the bits from the Sierra (Idiot) I was lumbered with the
original heater. Just a minute, what about the wipers.. Previous
owner had diligently shortened arms and mountings a la video BUT
the damn things went over-centre, jammed and didn’t self
park. Rip the whole lot out together with the scuttle and loom
and pedal box etc etc etc. In fact I decided to start from
scratch.

Pedal box – what an idiotic idea making a wedge from wood and then squashing it to pieces with a 10mm bolt. Best idea is to TRIANGULATE the original pedal box down to the scuttle mounting bolts. Now it feels like a Brick whatsit. What about the clutch cable – too long and doesn’t work even with a spacer – answer is to find a new pedal box from a Sierra. This was to be my BEST purchase to date – some boxes have a side support for the clutch pedal and this also an extension tube which the cable passes through – NOTE that this is the exact length needed for the clutch to work perfectly.
Remember that I started off by making the screen….I looked at vacuum cleaner nozzles to fasten to the demister vents but to no avail. Instead I used some 1.5inch plastic waste pipe flattened and riveted at one end and offered up to the vents. I then drilled through the top of the scuttle and riveted the pipe in place. I then drilled a number of large holes through the vents and into the pipe. Vent covers in place and now all I had to do was connect up the heater with a flexible waste pipe for a washing machine. Believe it or not this system did get me through an SVA. Note that the examiner also informed me that someone had turned up with a 12v hair drier attached to the screen and that had passed…
I won’t talk about chopping the ford heater about and connecting up plastic piping – I used lots of ingenuity, rivets and silicone. Shoved the whole lot back, and connected it up – Yippee, it all works, check wipers, BANG, BANG, BANG – sound of wiper mechanism decapitating the heater – modify with LARGE ball-pein hammer (Twice)
Before I can fix the instrument cluster I have to make space for the fusebox, which must have come from a 40 tonne lorry - the sheer size of the thing was awesome. Fasten down fusebox and now fit screen. I won’t bore you but did any of your self-tapping screws snap after fastening the frame together? Aren’t they a pain to get out?
Now to alter the route of the loom through the scuttle, pedal box and into engine compartment. I think that I’ve found a reasonable path but it would take a few sketches to explain. Make battery holder and mount battery on scuttle in centre. Throw away windscreen washer container supplied and get sensible Fiesta one (but use new pump supplied.) Wiper arms took me about two weekends to complete BUT I don’t use Richards idea of sealing with a ‘bit of spare rubber’ instead I cut some stainless ovals and used Araldite to fasten them under the wiper shafts – they look neat and are relatively waterproof.
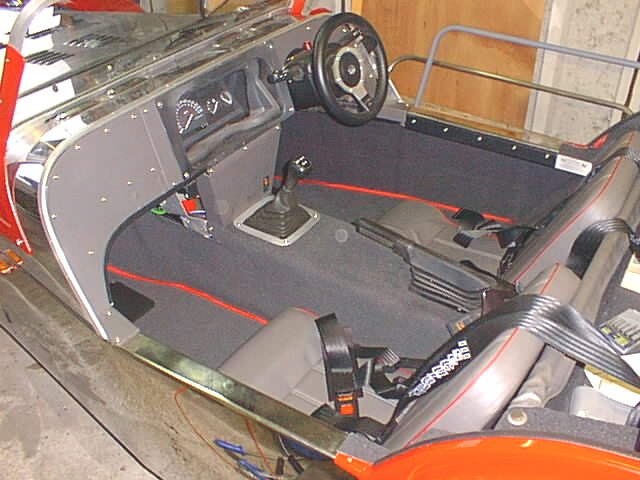
Now for an extension of the dashboard to the transmission tunnel (to cover up all the spaghetti and fuse-box.) This is a good place for the rear foglight switch.. Things are now looking splendid inside the car. Now to the outside again.
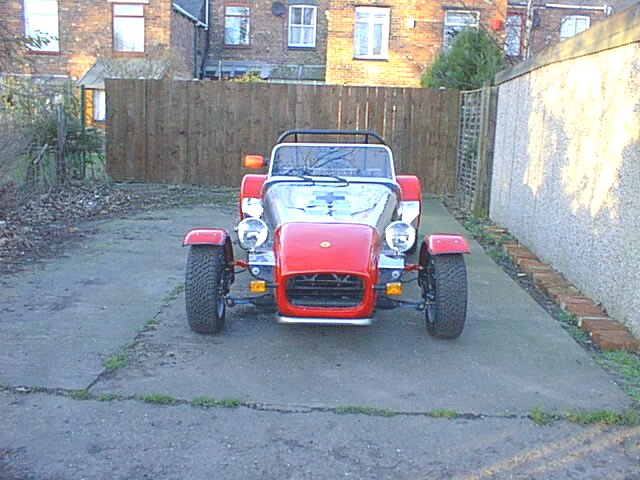
Nosecone looks odd! It isn’t mounted properly and the bonnet doesn’t fit. Take it all off and start again. Two weekends later and I can fit the infill panels on the nose – what a crappy job. At this point I decided to scrap the indicator things at the front and went Westfield!! Bought a pair of rubbery lights on arms from a TOMOS moped. They already have 12v bulbs and fit on the side of the nosecone – brilliant and best £8 I’ve spent so far.
Need a handbrake. Fitting lever isn’t a problem but what about the cable? Don’t mess about with screws and hammers – just silver solder a nipple on. Use the shank of an old bolt with 1/8" drill and use a gas blowtorch to silver solder (use "easy" as this melts at a lowish temp compared to all the other silver solders – you will need some flux – Borax based will do but make sure it is all washed off after heating . I’m not sure what proprietary fluxes are available nowadays.
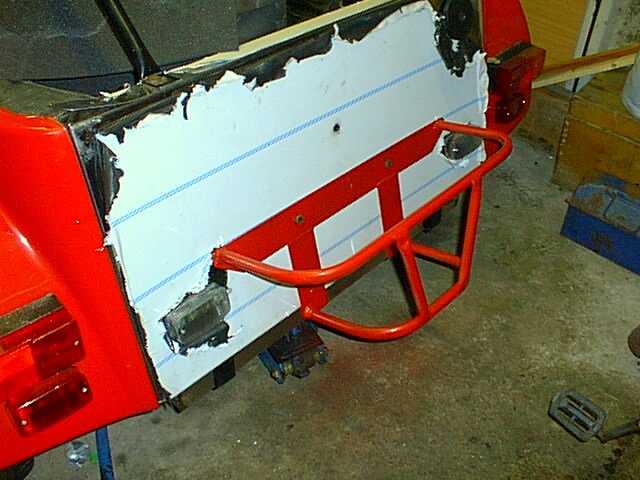
Have now decided that the spare wheel support/number-plate holder needs throwing away and replacing. Design and make a substantial holder fastened to rear panel of car with internal strengthening. Must brush up on my MIG welding – last time was building a Panhard rod for an Escort Twin-Cam in 1978.. Biggest problem here was painting the thing with Hammerite smooth – horrible stuff (takes six weeks to cure)
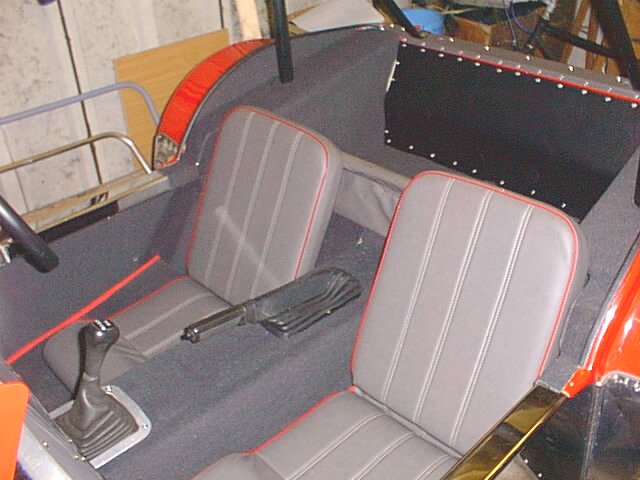
Lets look at trim. Inside the boot looks ridiculous, I’ve also decided not to install the SVA filler panels, which came with the kit; for one thing they don’t fit and second they take up too much space. Instead I’ve decided to panel out the boot with angle (aluminium) and panelled with ally sheet and covered with either PVC or carpet. After one Saturday morning all was looking great. Discovered that Petrol tank sender unit was Naff so take out panels and install a second-hand one – still isn’t too accurate – must buy a new one (£35 from Mr. Ford)
Cockpit trim next – Ally angle everywhere covered in either PVC or nothing. Fit seats – strength, what strength? Is the plywood 4 or 5mm? Must buy some REAL seats when it’s on the road. Roofing bolts keep pulling through the plywood – answer is to reinforce area with ally or mild steel plate (bolt through centre of plate and then impact adhesive and screw plate to bottom of seat.) Unfit seats and install seatbelts. These are a very tight fit and really tried my patience – I’m fairly small and the adjustment almost ran out for me – did Richard assume that all RH drivers would be six feet two and twenty stone? Grind off all extra thread like steering column support hoop and stick in the carpets. I used an impact adhesive for all the side carpets and spent many happy hours inside the footwell – my advice is to get someone else to do it or take up sniffing petrol.
After having spent weeks working on this thing it is now time to drag my wife into the garage to show her the results. "Very nice dear – but it doesn’t look any different to when you started!" I have to agree that on initial impressions she must be right (but I know what went into it!!)
Must now consult SVA manual. Check that all pipes and electrical cable are secure. I bought LOTS of sticky backed cable clips from a local electronic supplier and they have been a godsend. Forget little ally clips with self-tapping screws – these are great even at 10p each. I attached them to EVERY pipe and cable I could find, in the engine compartment, under the scuttle, under the back of the car (even brake pipes.)
Ring SVA examiner to ask about a few details. We spent about two hours with paper and pencil and some photos I had taken with me.
Having sent off an application for SVA I was given a test date within 10 days. This now gave me something to aim for – February 16th 1999.
Must now fit side indicators – these can now be fitted "anywhere" along the side of the car. I elected to fit mine just below the screen support on the body, not the scuttle. Fit spare wheel rack – what an ingenious piece of engineering – started with 4 metres of conduit and a pipe bender – I don’t intend to patent the beast. Fit front bumper/number plate support. Car has to be jacked up very high to get my electric drill in underneath. Pilot holes first, one, two three and four – straight through the bottom radiator hose. Be warned! I would fit the bumper bar when the chassis was upside down and then take it off until the last minute.
Brake fluid warning light. Use the cap from a FORD with float switch. Use the spare light in the instrument cluster – this is the smaller size of warning light and may be difficult to obtain from FORD especially the bulb holder. The switch simply supplies an earth (negative) supply to the warning light in the cluster.
Regarding my SVA report, I did mention that the speedo stopped working but didn’t say why. The inner cable had broken just as it exits the gearbox (tight bend!!!) but had continued turning and became a mass of burnished steel. How to get at it – solution was to cut a great hole (100mm diam approx.) using drills, monodex cutter (broke when I hit the double thickness at the bottom of the transmission tunnel.) This allowed be to drill out the old cable (two hours) and finally install a proper cable complete with circlip, which comes out into the driver’s footwell and under the carpet. I have fastened it to the side of the transmission tunnel with – clips and screws! This is an admirable solution to the problem of cables. This was all finished off with a neat ally plate screwed over the hole and carpet. I have now completed 500 miles of running-in with no problems.
After the SVA I tried the car out (after having a four-wheel tracking adjustment at Kwik Fit -£18 !!) My car was 1mm out of alignment overall from front to back. Now to give it a blast down the motorway. Maximum speed was as Richard states in his official SVA declaration – "Maximum Road Speed – Design speed 90mph" Mine would NOT go over this even only running at under 4000rpm.
I decided to have the car sorted out on a rolling road. Answers:
Even after sorting this lot out it really does still struggle at these sorts of speeds. Still, the acceleration is pretty startling albeit noisy and economy seems ok. One weekend I drove to Scarborough and up Oliver’s Mount – a round trip of 105 miles and only used £10 of petrol (after the budget!)
I must now fit tie bars instead of the standard Ford anti-roll bar, which is far too stiff, AND in the wrong position. An RS2000 sump is also on my wish list especially since the council has now designated my Avenue as "the land which shall have far too many speed bumps"
If any builders among you needs any further information regarding my build then I’m always happy to take any piccies (only digital – it’s quicker) and e-mail them to you or you can ring me at any reasonable time on:-
01482-471140 OR 0961-884333 (Mobile)
Regards,
John
Some more piccies of the beast.